Tuesday, October 23, 2012

DIY Halloween Decorations

You dress up in a fun or scary costume when it is Halloween. But what about your house? Do you 'dress' it up too? Gather your family around and make some simple Halloween decorations to put around the house. Here are a few ideas.

HOMEMADE HALLOWEEN DECORATIONS

1. FAKE BLOOD. You might think that ketchup is the only thing around to make fake blood but you are wrong. You can also make some using a cup of corn syrup, a tablespoon of water, 2 tablespoons of red food coloring and tablespoon of yellow food coloring. Once you mix this all together, you will realize that it looks more realistic than ketchup.

2. WILD ANIMAL IN THE BUSHES
If you want to make people think that there wild animals in the bushes, you will need a string of Christmas lights and some 35mm film canisters. With the canisters facing you, drill two holes on each one so you can create the eyes. Now put the string of Christmas lights so that the light will come out of each hole. To make it stay in place, put a piece of tape over it.

Should you be using white lights, cut a small piece of red cellophane wrap and put this over the lights to create the impression that there are wolves behind the bushes.

3. TOMBSTONES
In order to create tombstones, you will need some Styrofoam, a can or two of grey sprain paint and a marker. Cut the Styrofoam to the desired size and height, spray it over using the spray paint and then write down the name of the person on the gravestone. When you are finished, plant these on your porch.

4. BATS
To create some home made bats, you will again need some foam. Another option will be to use construction paper. When you have the materials, cut them out in the shape of bat. Paint these black and then stick this to you ceiling or plaster this on your window.

5. DEAD BRANCHES
If you have a chandelier inside your home, go to the forest and see if you can pick up a few dead branches. When you bring them home, try to put these around your chandelier.

6. INSECTS AND BODY PARTS
You can also create some Halloween décor using some old glass jars. Put in some plastic insects and body parts and then mix this up with food coloring and water. To make it look more authentic, put in ragged gauze or a waxed string then put this on the dining table.

7. FLOATING HAND
Spiking the punch bowl is probably something you did back in college but for Halloween, people will surely laugh when they see a hand inside. For this, you will need a plastic glove and some ice. Put the ice inside the glove then close it so the ice will not go out and the glove will be able to float in the bowl.

8. PAINTED PUMPKINS
Halloween is not the same without a pumpkin. You can’t make this so you have to buy one from the store. If you have young kids and don't want them to get accidentally injured from carving pumpkins, you can opt to do pumpkin painting instead. Even very young children can do this. You can paint the pumpkins to look like funny or scary faces. Put a bunch of them in your garden and I'm sure your neighbors will love it too. If you don't know how to do it, here's a book that will show you how:
.....  Easy Pumpkin Painting


There are other Halloween decorating ideas you can do inside and outside your home. All you need to do is browse for a few ideas online and then follow the instructions.

Wednesday, October 17, 2012

How to Make Halloween Fun

Guest post

Whether you are having a party or you just want to make your children’s Halloween a memorable one here are some really cute recipes you can try this year. These are such easy treats that you and your children will have a blast making them together. Halloween is right around the corner so it’s time to get started!

1. Bed Bugs – These are No Bake Peanut Butter Choco-Oatmeal Cookies. They sound perfectly yummy all on their own and with the addition of eyes and legs they become bed bugs! The author said that she originally intended to use black licorice strings for the legs but couldn’t find them anywhere so she substituted chow meinnoodles. For the eyes she used red Sixlets candy or cinnamon Jelly Belly’s, but you can use your imagination. Again, these cookies are no bake and wouldn’t take long at all to put together. They call for white sugar, milk, butter, cocoa powder, peanut butter, oats, coconut flakes, and vanilla. I wouldn’t mind taking some of these bugs to bed with me!

2. Peanut Butter Spider Cookies  – You can make your own peanut butter cookies or use the recommended Betty Crocker Peanut Butter Cookie Mix. They are extremely easy and cute. After baking the cookies they say to stick on a “chewy caramel in milk chocolate” which looks to me like a Rollo. I think you could also use those Mini Reese’s Cup candies. You put them on when they come out of the oven and they melt on. Then you attach string licorice legs in either black or red out the sides of the candy. Using Mini M&M’s for eyes with a dot of black gel icing (or you could melt chocolate chips and dab on with a toothpick).

3. Spooky Brownies (Franken Brownies, Boo Brownies, Spider Brownies)  – Simply make your brownies and decorate with icing covered large marshmallows. They are so cute, you just have to click on this link and look at the pictures. You need white icing; gel food colors in regular and neon colors, Miniature M&M’s (candy-coated chocolate baking bits), decorating gel, Fruit Roll-Ups, Chewy Fruit Snacks, and Gummy worm candies. Or take a look at the pictures and use your imagination. These are just the cutest little scary monsters that would make anyone smile.

4. Spooky Monster Cookies – Besides making the chocolate cookies (which you could purchase if you have a favorite brand or bakery near you) these take just a short time to make. All I can say is that you have to be a fan of icing, and I can’t say that I’ve met any children and few adults who are not. They are filled with icing and have icing eyes to boot! Each cookie has a monster just dying to get out and come to the party!

5. Monster Cake  –This monster has a similarity to Frankenstein, green and square. Start with a chocolate fudge cake mix and baked as a sheet cake. You will need white frosting, black food coloring, neon green gel food coloring, black decorating icing, and black string licorice. They say to use the picture on the site as a guide for decorating. I was looking at the cake and thinking about those nuts and bolts that were always sticking out of the side of Frankenstein’s neck. Why not put a Rollo or Mini Reese’s Cup on the sides? Or better yet use Tootsie Rolls and shape them to look like nuts on bolts? Just an idea.

6. Spider Web Cake  – It looks like a spider has made his web on top of your bright orange cake and is dangling from the side making his way towards the bottom! What a cute cake idea. Start by baking a layer cake either by using a mix or from scratch. Use vanilla frosting that you dye orange with food coloring. Betty Crocker apparently has something called Black Cookie Icing that you need to ice the chocolate wafer cookie (like an Oreo) with and let dry for an hour before putting it on the cake. I would think you could do the same thing with a semi sweet chocolate chip and shortening mixture. You also need black licorice candy; it looks like the regular twist kind to decorate the bottom edge of the cake. This is really an adorable cake and not at all hard to make.

7. Mini Pumpkin Bundt Cakes  – I love these little cakes. When I saw them I think I squealed just a little. What is more precious than a mini Bundt cake? Two mini Bundt cakes bottom to bottom to make the shape of a small pumpkin! With orange icing, green sour straws for stems, and green gum drops rolled out with a rolling pin to look like leaves, this cake would be the hit of any party. This would work for Halloween or even Thanksgiving. Someone had a great idea when they came up with this one. You can either use a box cake mix or make it from scratch with some homemade icing. I can imagine these as a center piece for the table. The best thing is that it’s extremely easy.

8. Halloween Mummies  – These would be really cute for a school Halloween party as treats if they were individually wrapped with a bow. These treats wouldn’t take long at all to make. You need the sticks, the Oreos, white chocolate melts or almond bark, and a little dark chocolate or maybe mini chocolate chips? I imagine the hardest part in making these is to open the Oreos without being tempted to eat out the icing! The directions say to open the Oreos and put a dab of white chocolate inside to make the stick stay in place. Put the cookies back together and refrigerate for a few minutes to make sure the sticks stay stuck (say that ten times). Then dip the Oreos in the white chocolate and let cool. Put a couple of dabs of white icing for the eyes while you are at it. After they have cooled you drizzle the white icing back and forth to make it look like mummy wraps. Add a dot of chocolate for the pupils of the eyes and viola there you have it!

9. Cheese-Finger Food or Cheesy Monster Digits  – I have seen these monster fingers done in many ways, mostly with string cheese like these or with bread stick dough shaped into fingers. They suggest you use plastic gloves or sandwich bags to keep the mozzarella cheese sticks from getting finger prints all over them while you are cutting out the finger nail area or carving in the “joints” of the fingers. This recipe uses pieces of green pepper for the nails with cream cheese as the “glue”. I’ve seen people use sliced or whole almonds as the nails also. These will be very popular with the kiddos. What kid doesn’t want to eat monster fingers made out of cheese?

10. Hairy Daddy Longlegs Cupcakes  – Start with chocolate cupcakes (or I suppose any flavor would work) and frost with chocolate frosting (this is a must because who has ever seen a scary spider that isn’t black?). Cover it with chocolate sprinkles for the “hairiness”. The recipe says to add two pieces of eye-type candy and they used a candy that I am not familiar with. I was thinking about what I would use and I thought of using Gummy rings with a large gumball stuck in the center. That would turn him (or her) into a big old scary eyed monster spider! The legs are made out of black licorice strings. I’ve heard that many people have trouble finding the black licorice strings these days however so I would suggest buying the twisted kind and just pulling it apart. Or you could always use sour straws instead.

I hope these some of these recipes will work for you and make you the hit of the party with friends and family. There are all kinds of hauntingly good ideas out there this Halloween season. My motto is to keep things simple, cute, and always yummy.

Author Bio:
Jason Miner plays a vital role for www.blogcarnival.com. He is an expert in writing topics of different categories. He is helping the carnival team to grow & working on making this an even better place for bloggers.

Tuesday, October 16, 2012

Baby wearing vs Stroller

I'm come right out and say I'm on the side of baby wearing. I'm not saying that strollers are no good but I just prefer using baby slings and carriers. They just work better for me.
  • They are cheaper
  • Easier to carry around
  • My babies feel more comfortable and usually sleep when I carry them
  • Very helpful when baby gets cranky or colicky
Take a look at this video on wearing your baby vs. using a stroller

ABC-7.com WZVN News for Fort Myers, Cape Coral

Are you a baby wearing mom or a stroller mom?

You can read my reviews on the following top baby carriers:
Enhanced by Zemanta

Friday, October 12, 2012

Getting Ready For The Holidays In October

It can get quite crazy preparing for the holidays, especially if you are the one doing all the planning and running around. With so many things to do, it is easy to forget something. It doesn't have to be so overwhelming you know. Here are a few pointers to make the holiday season go smoother and a bit more relaxing for you.


Set Your Budget
First and foremost, if you haven’t already, you need to figure out what your budget for holiday expenses is. If you don’t think your budget is big enough, don’t fret, there are still a few months for you to save a few more bucks.

Make An Action Plan
Give some thought to the things you need to do (some of which are included below). Once you’ve figured out the essentials, make a rough timetable that gives deadlines for each task. You can mark this onto a household calendar to serve as a reminder and help you to keep on top of preparation tasks.

Start Getting Presents Now
For most, holidays are a time of giving, and this usually comes in the form of presents. Don’t waste any time – if you’re going to get presents for family and friends, start buying them right now! If you’re short on ideas, then ask your kids, friends, and family to give you some suggestions. The key is not to leave present-buying right up until the last minute. This saves all the stressful and unnecessary rush, and also helps to ensure you can get the gifts you really want for your children.

Write Your Holiday Cards
If you like sending cards out to your friends and family during the holiday season, then don’t wait until the last few weeks before getting them ready. As soon as you see cards in the shops, buy some that you like and start writing them out. You can have them all signed and ready to go well before send-out time, leaving you with less on your mind as the season approaches.

Stock Up On Ingredients
If you like making special treats for holidays such as cakes and other baked goodies, then buy up the ingredients you need now. As holidays approach, the things you want are going to be more in demand and may not be as easy to find. Once you’ve got the ingredients you need, start baking early. Some cakes need a couple of months to mature before they’re ready to eat, so make sure you get these ready well ahead of time.

I'm sure some of you have your own way of making your holidays less stressful. Drop a comment and let me know how you do it.

Thursday, October 11, 2012

Loh Shu Fun Noodles

At least one day of the week I will cook noodles. My kids like it dry but my DH likes it with soup. No problem, both can be done.
 Loh Shu Fun with "kicap" sauce

Loh Shu fun with soup

To make the soup I bought 2 chicken carcass to boil. Throw in some garlic and big onion for extra taste. Marinated some minced pork with salt, sugar, soy sauce and oyster sauce. Add a little corn starch to make it stick when I drop them in the soup like meatballs. 

To make the "kicap" sauce, I used light soy sauce, dark soy sauce, pork lard oil (can be substituted with garlic oil), fish sauce and oyster sauce. 

For noodles, I will usually buy "kuey teow" or "loh shu fun" (rat's tail noodle). The 'loh shu fun" I will buy both short and long ones. More choice for my family. 

Extra ingredients include 'taugeh' (beansprouts), pork ball or fish ball, quails eggs, fried garlic and shallots (very important), spring onions and cilantro (Chinese call 'yin sai', but usually I'm the only one who eats that).

It doesn't take much effort to cook this. That's why I have this once a week. Need some light cooking days so I don't burn out :)

What do you cook when you want a light and easy cooking day?

Wednesday, October 10, 2012

My family’s tips on limiting Halloween candy


This is a guest post

I love Halloween. I love everything about it--trick or treating, costumes, parties, decorating the house, and the loads of candy. Yep, I’ll admit it. I love candy. But, I’m also a reasonable person who knows it’s not good for me, and that it’s certainly not good for my kids. So how do we balance the fun and excitement with the goal of having healthy kids whose teeth aren’t falling out? Here are the things that I have found work best for my family.

Halloween Day. Let’s start at the beginning of the day. Where my kids go to school, they each typically have a Halloween party, so they’re most likely already sugared up before they even get home. To try and counter that as best as I can, I make sure that they have a protein-packed lunch, and then I have a nutritious snack waiting for them. I might put out a plate of chopped veggies with some almonds and a few slices of cheese. Then I feed them dinner before we head out trick or treating so they’re not hungry before they get started.

Trick or Treating: The Big Event. Far be it from me to put a damper on trick or treating. We go all out around here, and we live in a neighborhood that’s packed with kids. My two daughters usually get a pretty good haul, but we try to be reasonable and limit how far we’re willing to walk. This in turn helps limit how much candy they bring home.

While trick-or-treating, we have a non-negotiable rule: No eating anything until you get home. Not only do I want to make sure the candy hasn’t been tampered with, but if they eat it while they’re trick or treating, they’ll mindlessly munch the whole time.

Let’s Eat Candy! Once we get home, they know ahead of time how much they’ll be allowed to eat. Three pieces to me seems reasonable. Then we do an extra good scrubbing on the teeth, and it’s off to bed.

Over the next few days, my girls spend a fair amount of time trading candy. During that week, they know how many pieces they are allowed to eat each day, and I let them choose when to eat it. It might seem odd that I would allow them to eat an Almond Joy before they’ve even had breakfast, but giving them control over “what” and “when” means they’ll argue or complain less about the “how much”.

Now What? So what do you do with the pile that’s still sitting around after a week? When my oldest was in 1st grade, she came home from school and told me about the Sugar Gnomes. Apparently these little guys come in to your house late at night and swap candy for a prize. At first, this seemed like a lot of work and a bit ridiculous, but then I realized, “What a great way to get rid of the candy!”. So now, after 4 of 5 days, the girls bag up some of their candy, place it by their beds, and in the morning, it’s been replaced by a toy or prize. I hate throwing things out, so the candy usually makes its way to mine or my husband’s office and is put in the breakroom. Otherwise I’ll end up eating it all!

Any candy that’s left is slowly doled out. The first week, they might be able to have 3 or 4 pieces a day because it’s still all very new and exciting. After that, it might dwindle down to one a day for a week or so, and then it goes back to becoming a rare treat. Before long, they forget it’s even there.


Author Bio: Hi, I’m Wendy Fanello, and I’m the mother of two daughters, ages 9 and 11. I love to get outside with my family, read, and garden. I’m also the Editor of an ultrasound career and education website. Read more of my work at: http://www.ultrasoundschoolsinfo.com/pregnancy-police/

Halloween decor - more treat than trick

(ARA) - While displaying ghosts and goblins is great for the kids and the standard for Halloween decor, how about getting into the spirit but with a bit more sophistication this year? If you are throwing a Halloween party for those adults who are kids at heart, a spooky holiday theme can still be part of the festivities, but with a touch of panache.

There are many directions you can go with a decoration theme. Certainly there are the colors of black and orange that can be integrated into the decor and the use of pumpkins or candles, which still scream Halloween but can be displayed elegantly.

Gary LaVasser, academic director in Set & Exhibit Design at The Art Institute of California - Hollywood, a campus of Argosy University, says that while everyone thinks of orange and black consider the combination of dark red and black. At Halloween, any time black is used it represents scariness and the dark red can be symbolic of blood. “For a more sophisticated look, combine dark red arrangements of roses, cover them in black hat veiling so that you see the roses through the veil and tie them together with black satin ribbon,” he suggests. “If you want to go a little further, place the arrangement on an inexpensive black placemat and drip dark red nail polish from a few rose petals onto the placemat. It will look like the roses are bleeding.”

LaVasser also has these tips for alternative but sophisticated Halloween decor:

* Use vintage Halloween toys from the 1930s, 40s or 50s as part of the design. If they are worn they have more character. Combine them with garlands of silk fall leaves available at most craft stores, tree branches or wheat and place on mantels or dining tables.

* Paint objects black that normally are not this color. For example, jack-o-lanterns are orange so spray them black for a twist on a familiar item. Also consider painting real flowers black. To make objects more interesting, select different black textures such as using matte, glitter, satin, gloss or metallic paints.

* The colors of fall are rich earth tones and these colors also associate with Halloween. Add a little “punch” by using a deep purple color. It can be an interesting contrast to oranges and gold tones. Also consider using metallic gold, copper and pewter colors. You can paint leaves or pumpkins with these shades as well.

LaVasser adds that one can look for inspiration among different cultures and how they celebrate certain holidays or Halloween. A Latino tradition is Day of the Dead, observed on November 1st and 2nd, which celebrates family and friends who have passed. “Day of the Dead decor includes folk art, candles, colorful flowers and bright ribbons together with skeletons,” says LaVasser. “This theme offers great options for Halloween.”

Monday, October 08, 2012

Five common mistakes most parents make when using car seats

(ARA) - Four million babies are born in the United States each year and that means more than 4 million new car seats are being installed. While great strides have been made to ensure that every infant rides in a car seat, unfortunately, parents are making five critical, but fixable, mistakes when using car seats, according to new data announced by Safe Kids Worldwide and the General Motors Foundation.

“Correctly used child safety seats can reduce the risk of death by as much as 71 percent,” says Kate Carr, president and CEO of Safe Kids Worldwide. “Engineers are working hard to ensure cars and car seats are designed to keep kids as safe as possible. But it's up to every parent to take full advantage of these innovations by making sure car seats are used and installed correctly.”

Motor vehicle crashes are a leading cause of death to children ages 1 to 13. In a nationwide effort to educate parents about the importance of car seat safety, Safe Kids and the General Motors Foundation are asking every parent to take 15 minutes for an at-home car seat checkup using the Safe Kids downloadable checklist.

The checkup provides the following important tips that will help parents begin to ensure their car seat is used and installed properly:

* Right seat. Check the label on your car seat to make sure it's appropriate for your child's age, weight and height. Like milk, your car seat has an expiration date. Just double check the label on your car seat to make sure it is still safe.

* Right place. Kids are VIPs, just ask them. We know all VIPs ride in the back seat, so keep all children in the back seat until they are 13.

* Right direction. You want to keep your child in a rear-facing car seat for as long as possible, usually until around age 2. When he or she outgrows the seat, move your child to a forward-facing car seat. Make sure to attach the top tether after you tighten and lock the seat belt or lower anchors.

* Inch test. Once your car seat is installed, give it a good shake at the base. Can you move it more than an inch side to side or front to back? A properly installed seat will not move more than an inch.

* Pinch test. Make sure the harness is tightly buckled and coming from the correct slots (check car seat manual). Now, with the chest clip placed at armpit level, pinch the strap at your child's shoulder. If you are unable to pinch any excess webbing, you're good to go.

The at-home checklist is meant to be a first step. Parents are encouraged to read the vehicle and car seat instruction manuals to help with the checklist. Parents are also encouraged to bring their car, car seat and child to certified child passenger safety technicians, who are waiting to help. Safe Kids hosts car seat inspection events across the country throughout the year.

To download a Safe Kids Car Seat Checklist or to find a car seat checkup event in your area, visit www.safekids.org.

Thursday, October 04, 2012

Mee Jawa

I had kept some prawn shells in the freezer to make prawn stock and so, I thought it was time to make some Mee Jawa. Turned out very nice, a bit too spicy for my taste coz' I added in too much red chilli. Next time, I will reduce the chilli so my kids can enjoy it too.

So this time, only the adults enjoyed it. For the kids, I made "kicap" sauce for them. My kids had to stay back in school for co-curriculum activities so I packed the noodles for them. Added in some fried garlic, fried shallots, spring onion, 'taugeh' (beansprout) and fishball. "Kicap" sauce was really simple: light soy sauce, dark soy sauce, pork lard oil (can substitute with garlic oil instead), fish sauce, oyster sauce and a dash of pepper.


Okay, back to Mee Jawa. You pretty much just have to prepare the sauce and the 'extras' that you want to put on your yellow noodles. My 'extras' include fried tauhu (sliced), hard boiled eggs, prawns, potatoes (boiled), taugeh (beansprouts), spring onions, fried garlic and shallots. Oh, and lime. You must squeeze lime onto your noodles for that extra 'oomph' taste.
My mom had shredded some cucumber. That was quite a nice addition too. My DH wanted to put in the 'tikus' and crunchy keropok thing that you find in mamak rojak. Unfortunately, I don't know where to get those.


Okay, now for the recipe which I got from kuali.com

INGREDIENTS
1 kg yellow noodles
1 kg medium prawns
500g sweet potatoes, mashed

2-3 heaped tbsp cornstarch
1/2 cup oil
Salt and pepper
2.5liter water

PASTE (Blend)
3 stalks lemon grass
6 shallots
4 pip garlic
4 cm ginger
4 cm galangal
5 red chillies

PRAWN STOCK
Boil prawns in 2.5 liter water.
When prawns are cooked (which is fairly quick, don't boil too long or they'll shrink and be hard), remove them.
Shell the prawns and throw the shells back into the pot to make the prawn stock. Throw in whatever prawns shells you've been keeping in the fridge.
Continue boiling for about 30 minutes.
Discard the shells.

DIRECTIONS
Heat up oil in the wok and fry the paste until fragrant.
Add it to your prawn stock, let it simmer.
Stir in the mashed sweet potatoes.
Add in cornstarch to thicken the sauce. Make sure you add a little water to the cornstarch first before putting it into the sauce. Don't throw in the cornflour powder into the pot or you'll get lumps.
Season with sugar and salt.

ENJOY!

DIY Halloween costumes that won't spook your budget

(ARA) - As the leaves turn, children of all ages begin their quest for this year's “it” Halloween costume. If you're like most parents, this typically requires thinking ahead and spending an average of $26.52 for each costume, according to the National Retail Federation's 2011 Halloween Consumer Intentions and Actions Survey.

The same study says seven out of 10 Americans planned to celebrate Halloween, and $1 billion was spent on children's costumes alone. With many families continuing to feel the economic pinch, an average of 18.9 percent of consumers will make costumes instead of purchasing them this year. What to do if you're not an expert sewer or crafter? Here are some DIY ideas from the experts.

Milva Di Lorenzo, Fashion Design faculty for Miami International University of Art & Design, suggests, “Start by doing research online - if you're even a little crafty, there are many unique, fun costumes you can create with little money and no sewing.”  She recommends the following websites:

spoonful.com/halloween

www.marthastewart.com (click on Holidays link on left)

www.parenting.com/halloween-central

Kate Campbell, fashion coordinator  at The Art Institute of Tampa, a branch of Miami International University of Art & Design, agrees. She also advises, “Get your child involved in creating the costume. Look at ideas and decide on a budget together. This ensures your child is excited about their costume, especially when their friends tout the ones from the store.”

For more inspiration, look at the quick costume ideas below from our experts.

Robot Costume

Needed: Gray sweat suit, one long aluminum dryer hose, two rectangular disposable foil pans, baseball cap, foil, colored markers, ribbon.

1. The foundation is a long-sleeve sweatshirt or undershirt and grey sweatpants.

2. Cut aluminum dryer hose in four parts. Place one on each leg over sweatpants for the legs. For arms, use ribbon attached to the hose with a stapler to connect the other two pieces across the child's back. Put on like a coat, one arm at a time.

3. Attach the two disposable foil pans with ribbons close to the corners, making sure there's enough space so it can go over the child's head like a sandwich sign.

4. Have your child use markers to create “robot” buttons and knobs on the foil pans.

5. Wrap a baseball cap with foil and use as the robot's hat.

Butterfly Costume

Needed: long-sleeved T-shirt and leggings in pink or any favorite color, poster or foam board in matching color, ribbon, tissue paper in coordinating colors, assorted embellishments, such as beads, glitter pens, rhinestones, hair band, pipe cleaners, hot glue gun or other adhesive.

1. The foundation is the T-shirt and leggings.

2. Draw (find an easy stencil online or free-hand it) large wing shapes on poster or foam board and cut them out.

3. Involve your child in decorating the wings. Make sure you plan the design before you start gluing.

4. Use ribbon to tie the wings together and to create backpack-style straps to hold them on the child's shoulders.

5. Use additional poster board to create a belt to go around your child's waist. Cut tissue paper in triangles and staple to the belt, overlapping at the top and with pointed ends down, to create a skirt. Decorate the head band and attach the pipe cleaners.

With a little imagination and patience, you can create unique Halloween costumes with your child and have fun, too! Finally, remember to take plenty of pictures!

To learn more about The Art Institutes schools, visit www.artinstitutes.edu.

Enhanced by Zemanta

Wednesday, October 03, 2012

Five tips for busy women trying to find balance and enjoy life's simple pleasures

(ARA) - Every woman knows that hectic schedules can make it easy to forget to stop and enjoy the little things in life. But by finding creative ways to embrace some of life's simple pleasures, you can make sure to stay happy and content.

Actress, model and celebrity mom Ali Landry says she's found that taking the time to enjoy some of her favorite indulgences in moderation - whether it's snacks, travel, exercise or even a night out - has been the key to being a happy mother of two. “There's no tried-and-true formula for finding balance and enjoying life fully” says Landry. “According to a recent survey, three in five women say that eating certain foods is their No. 1 source of guilt. I disagree with this whole heartedly. I refuse to feel guilty about enjoying the things I love - like chocolate.”

Landry offers five tips for striking that balance:

* Ever feel like you need a vacation but don't have the time or the budget to pull it off? Opt for a vacation activity at home instead. Head out to a nearby beach or park and pack a picnic to enjoy with the friends and family. Then schedule a night of fun at home playing a new game or enjoying a new activity.

* Allow yourself to indulge with moments of moderation. Always abstaining from your favorite treats might lead you to binge after an especially stressful day. Landry allows herself a daily indulgence of her favorite snack: chocolate. “I love Hershey's Simple Pleasures chocolates because they are individually wrapped, and they're 30 percent less fat than the average of the leading milk chocolates,” says Landry. “I'm a woman who wants to be able to savor her chocolate without the guilt. I'm rejoicing since I found Hershey's Simple Pleasures chocolate - it's a delicious chocolate you can feel great about loving.”

* Busy women across the country struggle to find time to work out. By finding activities like kid-friendly yoga or going for a hike with friends, you can get your workout in while spending quality time together.

* If you're craving a night at a fancy restaurant, but can't get away or don't want to leave the kids, create a restaurant atmosphere at home for one special meal. Dine together with the kids and then once the kids are in bed, set aside time to read or have a drink on the porch with your spouse.

* Schedule small bits of “me time” each day, even if it's just 15 minutes to read in a quiet part of your home. Talk with friends, roommates or family about the importance of having this time to yourself and they'll be more than understanding when they see the restorative effects that a little downtime can have on your demeanor.

“I have learned that if you take some time to enjoy the things you love, and find ways to incorporate them into your everyday life, you can help reduce stress, allowing you to be happier. For busy women trying to find balance, there's no getting around the fact that some days will be more challenging than others,” Landry says. “But women should remember to take care of themselves too, and I've found that working in a few simple pleasures in moderation helps me be a better friend, mom and wife.”

For more on Hershey's Simple Pleasures(R) chocolates and a full list of flavors, visit www.facebook.com/hersheyssimplepleasures.

Monday, September 24, 2012

Crochet Project: Bottle Covers

My mom has been making these for my kids: Bottle covers.

My daughter came home and told me that her friends liked it very much. They asked where they could buy it. When she told them her grandmother made it, they asked if one could be made for them and they would pay for it :)

The pattern is very simple. Not complicated at all. Sorry, don't ask me for instructions. If you know how to do some crocheting, this will be a very simple project. Just do a base to fit the bottom of the bottle, and then a simple chain of five for the sides. Change the color of the yarn to make it look nicer. Do a string to tie the top and add pom-poms.


Friday, September 21, 2012

How Old To Pierce Your Daughter's Ears

Finally got my little girl's ears pierced. My mom has been asking me when we were going to do it. So, when her 3rd birthday rolled along, we took her to the goldsmith shop and got it done.

I'm not sure if she really knew what was going to happen. The salesgirl brought out the earrings for her to choose. At first she pointed to the sparkling pink stone. Then the girl brought out some pearl ones and she quickly changed her mind and wanted that instead.

I told her briefly that it was going to hurt a little. The salesgirl was quite good too. Kept reassuring her that it was going to be okay. As the gun pierced her ears, there was a look of shock on her face BUT no tears, no crying... not a sound. She bravely let the girl do the other ear. When it was done, I quickly carried her to the mirror and kept telling her how beautiful she looked. That was my distraction plan.

It has been a few days now. So far no problem with the ears. I just keep dabbing the ears with baby oil.

With my eldest girl, my mom took her to pierce her ears very early too. Can't quite remember when... maybe when she was 2+. I know in the Indian culture, they pierce their daughter's ears very early, when they are still a baby.

I didn't want to do it when they were still babies because if it hurt or was uncomfortable, they wouldn't be able to tell and might even pull it with their hands, thus making it worse. The downside is if you wait until they are older, they might not want to do it and won't let you do it too.

So, did you get your daughter's ears pierced and how old was she?

Wednesday, September 19, 2012

Why Is It So Difficult To Say Potato?

Caught this cute video of my daughter trying to say the word "potato". It can be such a difficult word :) Oh, she did master it after one day. So I'm glad I didn't wait too long to video her trying to say it.


Mamas Parenting Tip
  • Don't be too lazy to grab that camera. Precious moments don't last very long. Catch it while you can.

Monday, September 17, 2012

My Little Girl Turns 3

Happy Birthday to my little girl. She turned 3 a few days ago. We kept the celebration low key. No big fanfare. Just got some junk food to make her a party pack. She ate junk food the whole day. We brought her to a toy shop. She chose a doll set with different dresses and a toy gun. Ya, great combination. We later took her swimming in the evening. Then out for dinner. Had her choose her own birthday cake at the shop. So cake was dessert, along with ice cream.

So, if you're a little bit Barbie and a whole lot Power Rangers, how do you blow out the candles on your cake? Watch this video. It is so funny and very unexpected.

So, using a term coined by a friend of mine... Happy Birthday Barbie Ranger!

Friday, September 14, 2012

Art Project Idea: Making Patterns With Yarn

Here's another art project idea my girl learned at school.

Basically you twirl some yarn round a stick (the length of a pencil). Tie to secure it to the stick. Then brush on some paint. Roll it on the art paper to make patterns. You can make circle patterns too. Here's a video so you understand better what I'm talking about.


Monday, September 10, 2012

Five ways to help kids boost their brain power


(ARA) - Everyone is born with about 100 billion brain cells. We form new connections between these cells throughout life, but the rate is particularly high when we're young. Since those connections facilitate thinking and learning, parents who want to help give their children an intellectual edge should consider the brain-healthy choices they make each day.

"Making the effort to nurture your child's brain with both proper nutrients and varied experiences, especially when they are young and developing at such a fast rate, is crucial," says speech pathologist Lauren Zimet, founder of Early Insights, LLC, and an expert on childhood brain development. "The connections in brain circuitry can be enhanced through the environments and activities a child is exposed to, and participates in, as well as the nutrients a child consumes."

Zimet offers five tips to help parents enhance healthy brain development in their children, positioning them for success in school today, and well into their future:

1. Select a rainbow
It's no secret that the benefits of fresh fruits and vegetables are numerous, but thanks to the results of ongoing research, you can confidently add brain health to that list. Encourage your children to eat a colorful array of produce (organic when possible) each day so they get the antioxidants, vitamins and minerals needed to nourish and protect their growing brains. If your child is resistant to eating produce, encourage them to come shopping with you and select something new to try. Kids are more likely to eat what they have selected themselves.

2. Relax the right way
While it's true that exercise boosts brain power, it's also important to teach children how to relax. Balancing activity with relaxation is important so that kids don't get too stressed, which can impact the brain's development and lead to learning and behavior problems. Teaching children early on the benefit of setting goals, working towards those goals, and giving their brain and body time to relax are important life skills. When it's time to relax, skip the TV and teach your child that taking a walk in nature, reading a book or drawing are great ways to unwind. Deep breathing is also an excellent practice to teach children of all ages.

3. Eat omega-3 brain food
Omega-3 essential fatty acids are critical to a child's brain development. They are called "essential" because we need them for optimal health. The problem is that our bodies cannot manufacture them and we can only get them from the food we eat or supplements we take. While fish, nuts and seaweed are good omega-3 sources, kids typically don't gobble down these foods. That leaves many parents worried that their kids aren't getting enough, and with omega-3 deficits linked to ADHD, dyslexia and other behavioral and psychological disorders, many are turning to supplements for their children. Experts agree that the safest, most reliable source of the most important essential fatty acids (EPA and DHA) is a high quality fish oil supplement. Fortunately, there are purified, molecularly distilled fish oil supplements that are manufactured with kids in mind. Parents should be sure to choose one of these chewable, tasty options like those by Nordic Naturals to ensure success in getting their children to take the supplements.

4. Happy brains are hydrated brains
Staying hydrated is important for growing brains and bodies. Water can improve energy, increase mental and physical performance, remove toxins and waste from the body, and keep skin healthy and glowing. Based on the trillions of cells in the body that need water to function, most nutritionists agree that children need more, not less H20. To estimate how many ounces of water your child should drink daily, divide his or her weight in half and aim for that number of ounces per day.

5. Be a positive support system early on
Learning is a complex process, but children will be more open to trying new things when they know their parents believe in them. Acknowledging effort, instead of the outcome, strengthens a child's belief in himself or herself. Teaching goal setting, prioritizing activities and working off of check lists exercises the prefrontal cortex (PFC) in the brain. Experimentation through trial and error is the way the brain learns best.

"Giving your child's brain what it needs to grow strong can help him or her at school and in all social situations," adds Zimet. "Utilizing these tips is a great way to help position your child for success in the coming school year, and beyond."

Tuesday, September 04, 2012

Broga Hill: Great Place For A Family Hike

DH attended a church youth camp at Broga during the Raya holidays. One of the activities was to climb Broga Hill. He found the hike NOT too difficult and it takes about 45 minutes to get to the top.

So he decided to take our 5 year old on his first hiking trip. The 2 older siblings wanted to go too. Me? I stayed home with my youngest girl.

I woke them up at 4am. Why so early? Because the idea is to get to the top of the hill to watch the sunrise. That's what a lot of people do. Yup, this is quite a popular place and plenty of people hiking (especially weekends and holidays). They got to the place around 5:30am and according to DH, already so many cars there.

Anyway, my 5 year old managed to get to the top and enjoyed the view there.


I think my family will be making another trip up Broga Hill, this time I have to go along. According to my daughter, the climb down is more difficult than the climb up. She tripped and took quite a bad fall. Her right hand had some cuts and bruises. She complained that whole day and the next day Sunday. However, come Monday her hand was miraculously healed just in time to join our family badminton activity :)

So, if you're wondering what activity your family can do together, try a moderately easy hike. Cheaper and more healthy than hanging out at the mall.

TIPS AND INFO
  • Broga town is right at the border of Selangor and Negeri Sembilan. No kidding. Driving down one of the roads in town and you'll see the signboard that says you're now in Selangor.
  • To get to Broga from Kuala Lumpur/PJ, drive towards Semenyih. From Seremban, go towards Lenggeng. 
  • If you want to watch the sunrise, you'll have to hike up early in the morning while it is still dark. So bring along a torchlight. 
  • There's a Rabbit Farm nearby the entrance to the hill. They've got other animals too like goats. I think it is RM5 per entry.
  • If you get hungry after your hike, just eat at Broga town. Lots of "makan" shops/restaurants.

Monday, September 03, 2012

Back-to-school meals made easy with grapes

(ARA) - The summertime probably felt like it whizzed by, and now you're getting into the back-to-school mode. Luckily, you can keep a sweet taste of summer in meals and snacks with refreshing grapes from California.
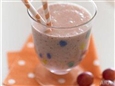
Kids and families getting ready for busy mornings are in need of healthy, energy-packed foods to fuel tightly scheduled and sometimes hectic lifestyles. Start the morning with a Breakfast-to-go Smoothie, a blend of fruit, yogurt and crunchy cereal for a hearty breakfast. Kids - and probably you too - will relish this satisfying and yummy drink featuring grapes and grape juice, both of which, according to mounting research evidence, may help support a healthy heart.

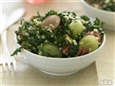
Bulgur Salad with Grapes and Kale is also a hearty, very nutritious and delicious meal all by itself, and perfectly packable for bring-from-home lunches. Grapes are really the key to making this salad inviting and flavorful for all ages. The sweet accents and the crisp qualities of the grapes offer a nice contrast to the chewy bulgur, crunchy nuts and shredded kale, which doesn't go limp like most lettuce will.

Make a big bowl or container of this salad and have it at the ready for a mini-meal for students going through a growth spurt or who need more calories in general, such as athletes, dancers, marching band members, etc.  Adventurous little eaters will also enjoy munching on this salad during lunch or snack breaks at day care or preschool. And don't forget to pack a cluster of grapes, too, for more sweetness and good health during the day.

Having a bowl of fresh grapes handy for nibbling after school is a great alternative to chips, cookies and the array of mini-pizzas and hand-held manufactured foods that are generally expensive and high in fat and salt.

Grapes are considered a super snack for a variety of reasons: Grapes contain just 90 calories per 3/4 cup serving, are packed with flavor and sweetness, and create virtually no mess - no peeling, no slicing, no coring.  In addition, all colors of grapes contain natural plant components known as polyphenols, which recent scientific studies suggest may help protect and maintain healthy cells.

Back-to-school may mean families are heading away from summer fun, but make it easier and a bit brighter with the sweet juicy taste of grapes.

Breakfast-to-go Grape Smoothies

Ingredients:
1 1/2 cups frozen California grapes
1 banana, sliced
1/2 cup vanilla or honey low-fat Greek yogurt
1/2 cup grape juice
1/4 cup wheat flake cereal

Directions:
Combine all the ingredients in a blender and blend for 1 minute. Serve immediately. Makes 2 1/3 cups of smoothie.

Nutritional analysis per serving: Calories 251; Protein 6 g; Carbohydrate 57 g; Fat 1.5 g;  5 percent calories from Fat; Cholesterol 2 mg; Sodium 47 mg; Fiber 3 g.

Bulgur Salad with Grapes and Kale


Ingredients:
1 cup bulgur
Kosher salt
1 cup pecan halves, toasted and roughly chopped
2 cups halved seedless California grapes
2 cups packed finely slivered kale or Swiss chard leaves
1/2 cup chopped Italian parsley
1/4 cup thinly sliced scallions
1/4 cup lemon juice
2 tablespoons extra-virgin olive oil
2 teaspoons finely grated lemon zest
Pinch cayenne
Black pepper

Directions:
Bring 2 cups of water to a boil in a medium saucepan. Stir in the bulgur and 1/2 teaspoon salt and remove from the heat. Cover and let stand 20 minutes or until most of the water has been absorbed.  Drain well and press to extract any excess water. Let cool and stir in the remaining ingredients. Season well with salt and black pepper. Serve room temperature or chilled.

Nutritional analysis per serving: Calories 289; Protein 5.8 g; Carbohydrate 33 g;
Fat 17 g; 50 percent calories from Fat; Cholesterol 0 mg; Sodium 181 mg; Fiber 7.3 g

Grapes from California are available May through January. For more information, go to www.grapesfromcalifornia.com or facebook.com/grapesfromcalifornia.